We spend most of our days with our hands in solvent or bent over a press bed, so when someone in the studio suggested running AI upscaling on some of our source files, there was a fair amount of skepticism around the worktable. Printmaking is slow on purpose. The registration, the pulling of a squeegee, the acid bite on a plate, all of it depends on us paying attention to material behavior that a screen can't fully show us. But we were curious whether upscaling, the kind that fills in pixel detail using trained models, could actually help us prep files faster without compromising what makes a print feel handmade.
Over about six weeks we ran the same test across three methods we use regularly: linocut, intaglio etching, and screen printing. We kept notes on file prep time, how the plates and screens behaved, and whether the final pulls held up next to our usual process. What follows is not a verdict that AI upscaling is good or bad for printmakers. It's a record of where it earned its place on our shelf of tools, and where it just made more work for us later.
Why we tested upscaling across three print methods
Each of our three chosen methods translates a digital file into a physical mark differently. Linocut relies on a carved relief, so file prep is mostly about converting a photo or drawing into clean black-and-white vector shapes we can transfer to the block. Etching depends on fine line work holding acid resist, so our files are often thin, continuous strokes. Screen printing separates an image into color layers by halftone or solid areas, which means file resolution matters most at the edges of dots and shapes.
We wanted to know if a single upscaling pass, run on a low-resolution source image, could serve all three workflows equally well, or if each process would expose different weaknesses in the upscaled result. Our working theory going in was that upscaling would help most with linocut, since it's the most forgiving of digital noise, and least with screen printing, since halftone work is unforgiving about edge accuracy.
We used the same test image for all three: a 72 dpi scan of an old botanical illustration, roughly 800 by 600 pixels, upscaled to 2400 by 1800 pixels using a standard AI upscaling tool before we touched it by hand. We then prepped that upscaled file alongside a version we enlarged and cleaned up manually in an image editor, the way we've done for years.
Preparing a linocut file with and without upscaling
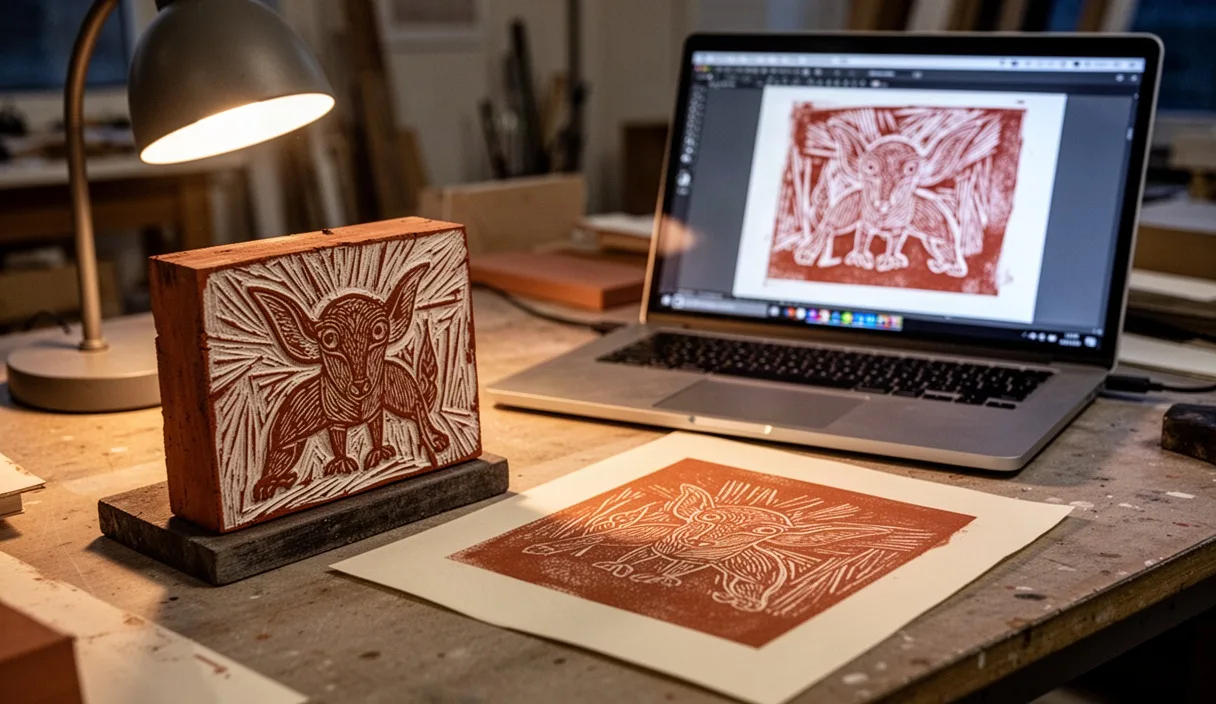
For the linocut test, our usual process is to take the source image, trace or redraw the key lines in a vector program, then print a full-size transfer sheet to trace onto the block with carbon paper. Manually cleaning up an 800 by 600 pixel image for a 9 by 12 inch block usually takes us 40 to 60 minutes of adjusting contrast, removing stray pixels, and smoothing jagged line edges by hand in the software.
With the upscaled file, that cleanup time dropped to about 20 minutes. The AI tool had already smoothed a lot of the jagged edges and filled in gaps in the thin lines of the botanical drawing, so we spent less time manually redrawing sections. The transfer to the block looked crisper than our usual rough trace, and the carving itself went faster because we weren't second-guessing where a line was supposed to end.
One thing we noticed: the upscaled version invented some detail in the leaf veins that wasn't in the original scan, soft texture lines that the AI model assumed should be there based on similar images it had been trained on. This didn't hurt the linocut, since carving naturally simplifies fine texture anyway, but it's worth knowing that upscaling doesn't recover lost information so much as it guesses convincingly.
What happened with an etched plate
Etching is where we got our first real warning sign. We transferred both the upscaled and manually cleaned files onto two separate zinc plates using a photo-resist process, then ran both through the same acid bath timing, 12 minutes in ferric chloride at room temperature, which is our standard bite for a medium-depth line.
The manually cleaned plate etched predictably. Lines we'd drawn by hand held their width and depth evenly, because we'd already accounted for how the resist would behave at that scale.
The upscaled plate had a problem we didn't expect. Those invented texture details from the upscaling, the soft vein lines in the leaves, were thin enough that the acid either over-bit them into ragged grooves or under-bit them so they barely held ink. We ended up with patchy texture in the final proof that looked more like acid damage than intentional mark-making. We had to go back and manually remove about fifteen of those fine AI-generated lines from the plate using a scraper and burnisher before we could pull a clean proof.
This told us something useful: upscaling that looks fine on a screen can introduce detail that is too delicate for a given print method's physical tolerances. A line that reads clearly in a JPEG preview might be thinner than what a 12-minute acid bath can reliably hold.
Screen printing and the limits of fine digital detail
Screen printing confirmed our original theory, though the way it failed was more specific than we expected. We exposed two screens, one from the upscaled file and one from our manually prepped halftone separation, both at 55 lines per inch, which is our usual mesh count for detailed poster work on a 230 mesh screen.
The manually prepped halftone behaved as expected, each dot exposed cleanly and the screen reclaimed without trouble. The upscaled file, however, had generated halftone-like texture in some of the leaf shading that wasn't true halftone dots, it was smooth gradient information that the AI had filled in to make the image look sharper on screen. When we ran that through our usual halftone conversion software to prep it for screen exposure, the software tried to interpret that smooth AI gradient as real tonal detail and created dot patterns far finer than our mesh could hold, some under 0.3 millimeters.
Those fine dots didn't expose properly on the screen, and what we got in the pull was a muddy, broken texture instead of the clean gradient we wanted. We had to go back to the original low-resolution scan, do our halftone conversion from that instead, and skip upscaling entirely for this method. For screen printing, at least in our test, upscaling added a layer of false detail that actively worked against the physical limits of mesh and emulsion.
| Method | File prep time saved | Physical result |
|---|---|---|
| Linocut | About 20-25 minutes | Usable, minor hand correction needed |
| Etching | About 10 minutes | Required scraper rework on fine lines |
| Screen printing | None, added time | Unusable, redone from original scan |
Where upscaling genuinely saved studio time
The clearest win was with linocut, and specifically with source material that was already simple in structure, like line drawings, old woodcuts we were referencing, or botanical illustrations with clear contours. In those cases, upscaling acted like a fast first pass of cleanup, smoothing jagged pixelation before we did our own line work on top of it.
We also found upscaling useful for preparing reference sheets and transfer paper when working from old family photographs for commissioned relief prints. A low-resolution scan from an old photo album, upscaled before printing a transfer sheet, gave us a clearer tracing guide than the original scan would have, even if some of that clarity was the AI's best guess rather than recovered detail.
In both cases, the time saved was in the early, rougher stages of file prep, not in the final technical steps closest to the physical plate or block. That distinction mattered more than we expected going into the test.
Where it produced results we had to redo by hand
Beyond the etching and screen printing issues already described, we ran into trouble anytime the upscaled file was used too close to the final production step without an intermediate check by eye. On one linocut test block, we skipped our usual proofing stage and went straight from upscaled file to carving, assuming the smoother lines meant fewer surprises. We ended up carving two leaf veins that didn't exist clearly enough in the original image, details the AI had invented, and had to fill the resulting lines with wood filler and re-carve that section of the block.
The pattern we noticed across all three methods: upscaling works best as an early-stage tool, not a final-stage one. Anywhere we treated the upscaled file as "done" and skipped our usual manual proofing step, we paid for it later with rework, whether that was scraping a plate, redoing a halftone screen, or filling and recarving a block.
Common mistakes
- Trusting upscaled fine detail as real information instead of a plausible guess, especially in etching where acid timing depends on accurate line width.
- Running halftone conversion software directly on an upscaled file without checking whether it introduces false gradient texture, which can break screen exposure.
- Skipping the usual hand proofing stage because the upscaled file looks finished on a monitor.
- Assuming one upscaling setting works equally well across different print methods, when each method has its own physical tolerance for fine lines and texture.
Next steps for your own studio
If you want to test this in your own practice, start small and keep your original low-resolution file as a control, the way we did. Run the upscaled version through only the early stages of your usual prep, whether that's tracing for linocut, resist transfer for etching, or halftone conversion for screen work, and compare it against your manual process at each stage rather than only at the final print.
Pay close attention to any fine detail the upscaling tool adds that wasn't visible in your original scan or photograph. If you're working with acid etching or fine mesh screens, consider printing a small test proof, just a 2 by 2 inch section, before committing a full plate or screen to the upscaled file. That small step costs you a few minutes but can save a plate or screen from a full redo.
Finally, treat upscaling as a drafting aid rather than a finishing tool. In our six weeks of testing, it never replaced the proofing and hand-correction stages that printmaking depends on, it just changed how much time we spent in the earliest rough stages of getting a file ready for the press, the plate, or the block.